You are here: Upgrading TestShell test types plugin
Upgrading TestShell test types plugin
To upgrade the TestShell test types plugin:
- Shut down the HP Application Lifecycle Management service.
Replace the files in the CustomTestTypes and Extensions folders of the HP ALM installation directory with the ones from the TestShell installation folder (~CloudShell\Integration\HP ALM).
- On Windows, you can find the HP ALM installation directory as follows: Double click the HP Application Lifecycle Management service and copy the installation path up to ~HP\ALM. Navigate to this path in Windows Explorer, open the webapps directory and then double click qcbin. For example: C:\ProgramData\HP\ALM\webapps\qcbin
Restart the HP Application Lifecycle Management service.
On the ALM Client machine, close any open Internet Explorer browsers.
Make sure the following two processes are not running. If they are, shut them down.
- ALM-Client
- Iexplore
Stop the TestShell Remote Agent component service:
- Open the Component Services dialog box.
- From the left pane, navigate to Console Root>Component Services>Computers>My Computer>COM+ Applications.
- Right-click TestShell Remote Agent and select Shut down.
- Open Internet Explorer.
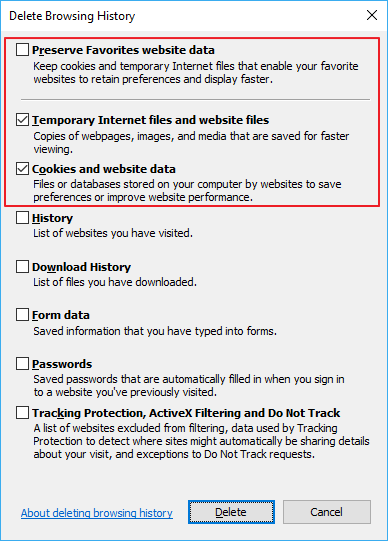
Delete the browsing history as follows:
- Make sure the Preserve Favorites website data check box is unselected.
- Select Temporary Internet files and website files and Cookies and website data.
Access the HP ALM server.
For example: http://192.168.42.172:8080/qcbin/ (where “8080” is the HP ALM server port)
The plugin is updated and the Application Lifecycle Management page is displayed.